

I’ve been meaning to detail my 2019 kitchen remodel and keep putting it off; I think it’s because I was so sick of thinking about it and working on it. I owe the credit for implementation success to father figure Dan for long ago telling me that the most important part of a project is the “thinking” stage. I started the remodel in May, 2019 and finished the week before Christmas. Anyway, now seems like the perfect time to share!
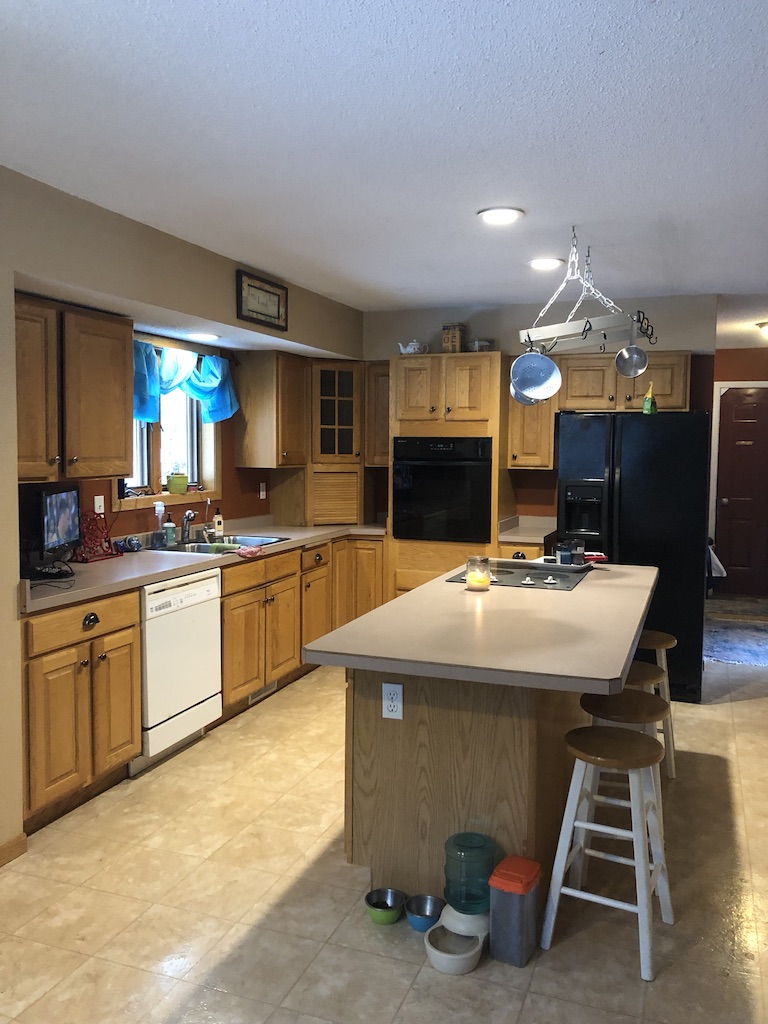
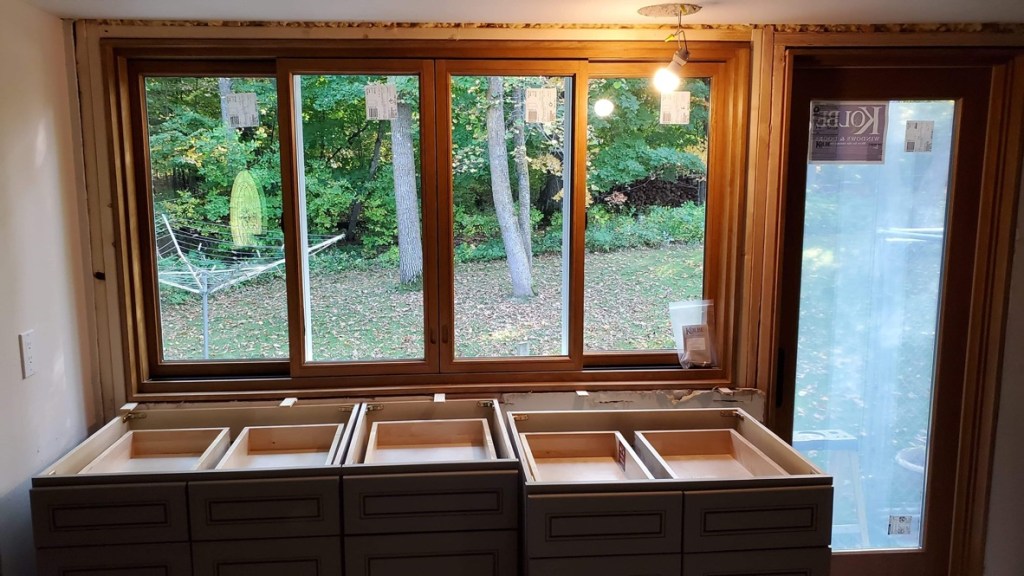
My vision for what the kitchen might look like that evolved ever since I moved here in 2006. Once every appliance in the kitchen was either partially or fully dead, I decided it was time. Here is the before picture. The windows look out into the back yard which is beautiful and virtually unused.
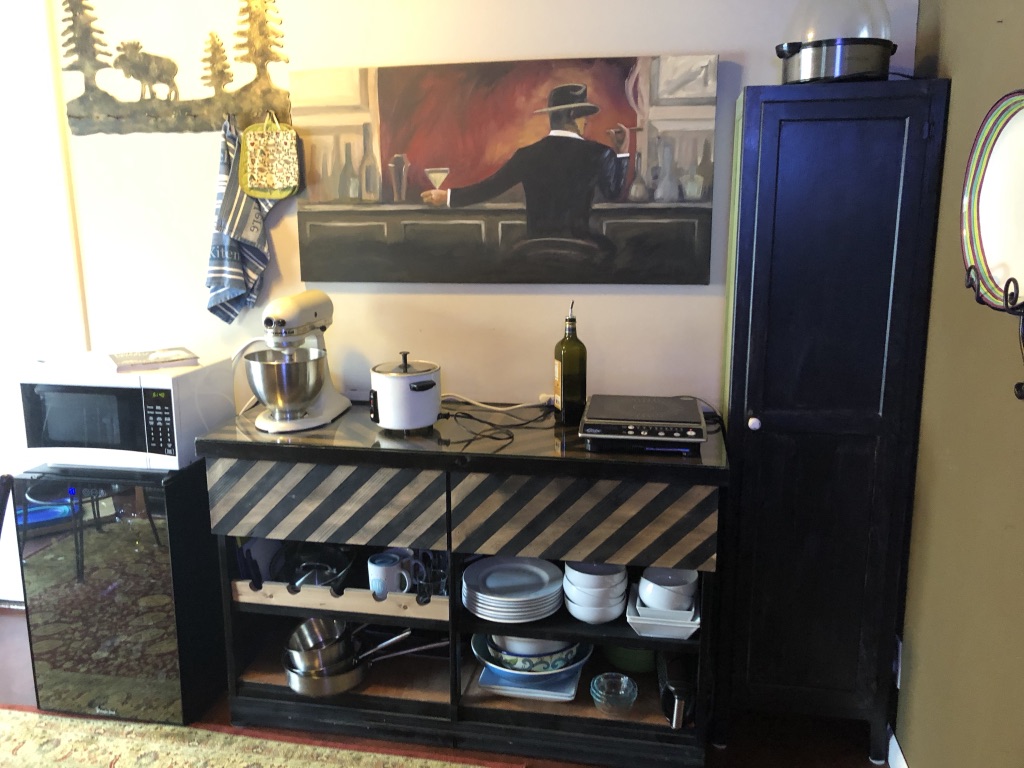
First, I created a backup “kitchen” in the basement bar area. I purchased the appliances I’d need, a single-burner induction cooktop from the thrift store and a pressure oven (not pictured) from Tuesday Morning on a West Bend trip in the year before the remodel. I added glass to the thrifted countertop, then subsequently shattered it because I forgot to order tempered glass. When emptying the old kitchen to the basement, I think I decreased the contents by 1/3. Then when moving it back up to the new kitchen, I probably toted another 1/4 off to Goodwill.
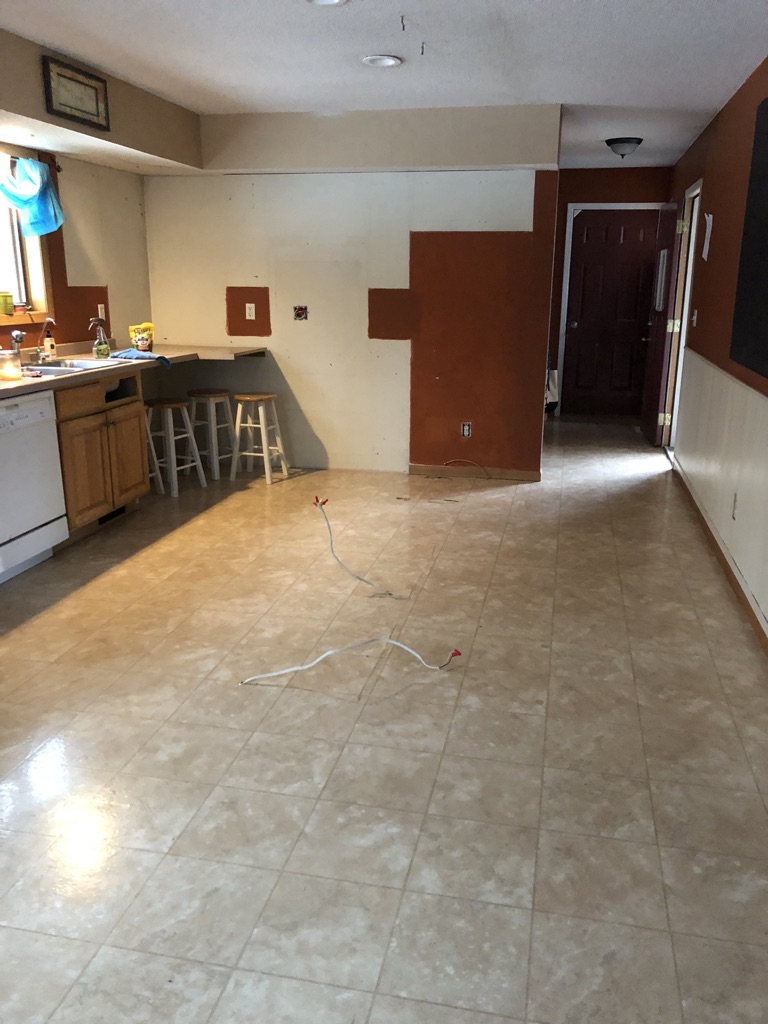
So the first step was to take everything out. (The theory here was to spur buy-in from all interested parties by an imperative to replace, said motivation exponentially intensified by project length.) The cupboards literally fell apart as I removed them, although I managed to salvage 5 or so for a neighbor’s garage. (No, those wires aren’t live; the breakers were off.)
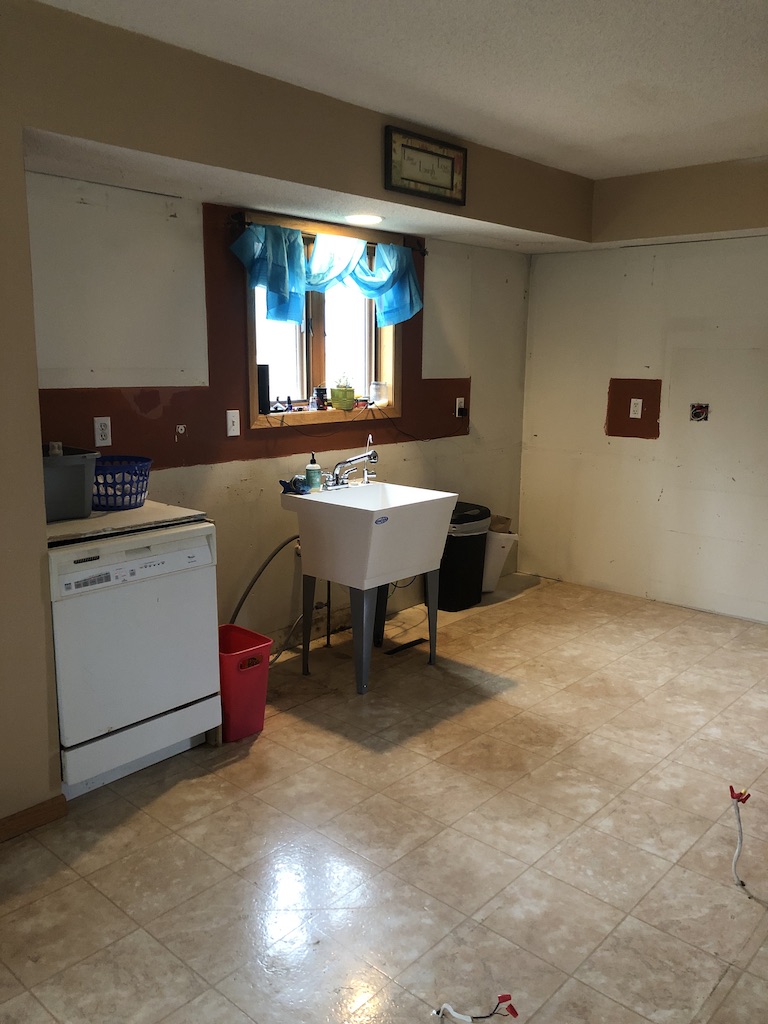
I kept the dishwasher connected for the early part of the project, and added a laundry sink for painting ease. The Wagner Smart Roller is my best painting tool.
I took the wainscoting off the wall adjacent to the living room, and of course they’d glued it on. I skim coated over the top and re-textured, applied primer to cover the chalkboard, and painted. I think the kitchen has 4 colors total.

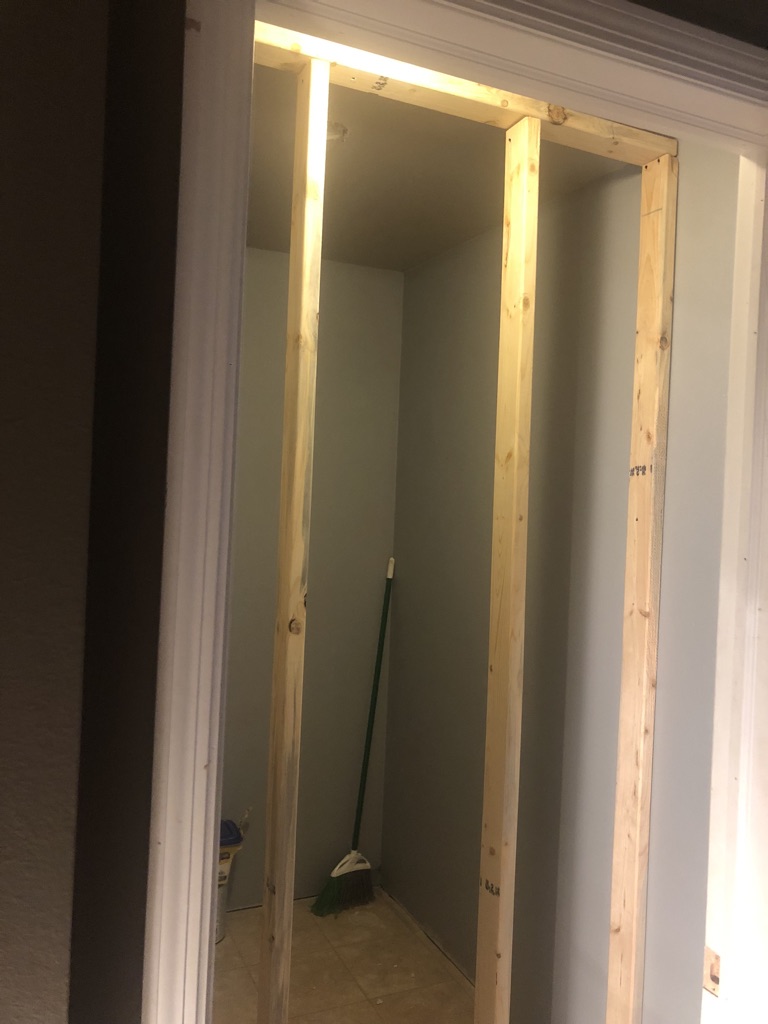
If you look at the first picture, a closet runs parallel behind where the fridge and wall oven used to be. It was a stupid closet, mainly because it was long and skinny and doubled as both a pantry and coat closet. It was first thing you saw when you came in the primary entry door and I hated having people over and hanging their coats in with of canned goods, rice cooker and instapot.
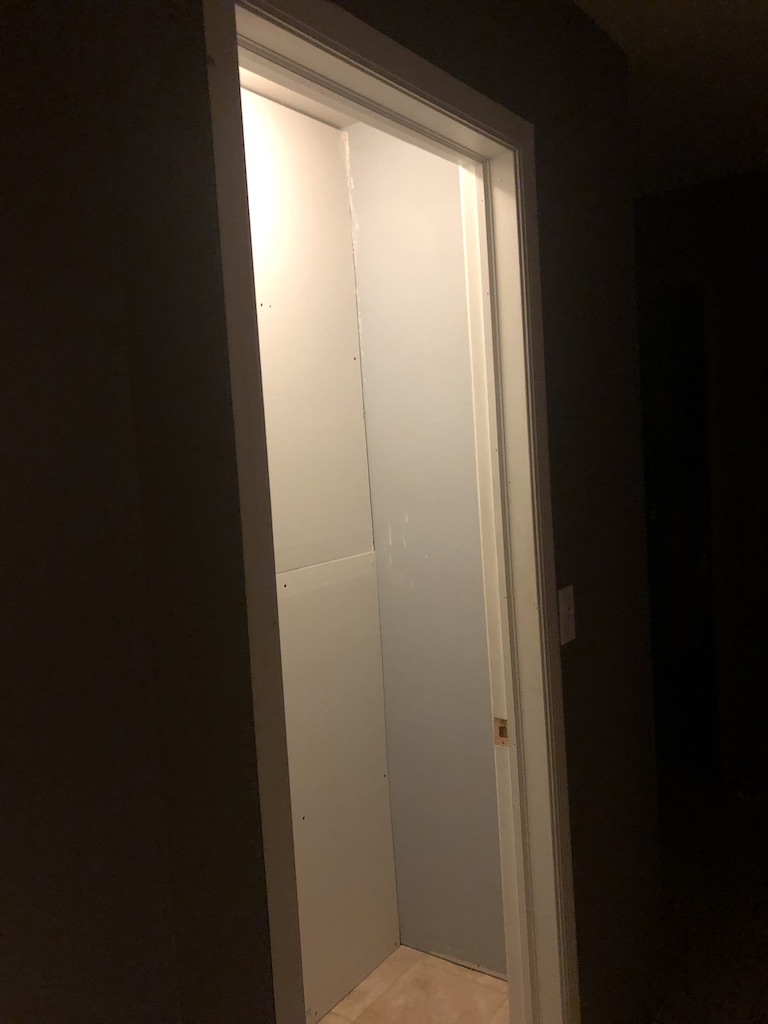
I removed all the shelving with plan to split the closet into two parts, pantry and coat closest. I had to move the ceiling light toward the hall to avoid replacing that light switch. I put up a wall to divide the closet, leaving just enough room in the front closet for hanging jackets.
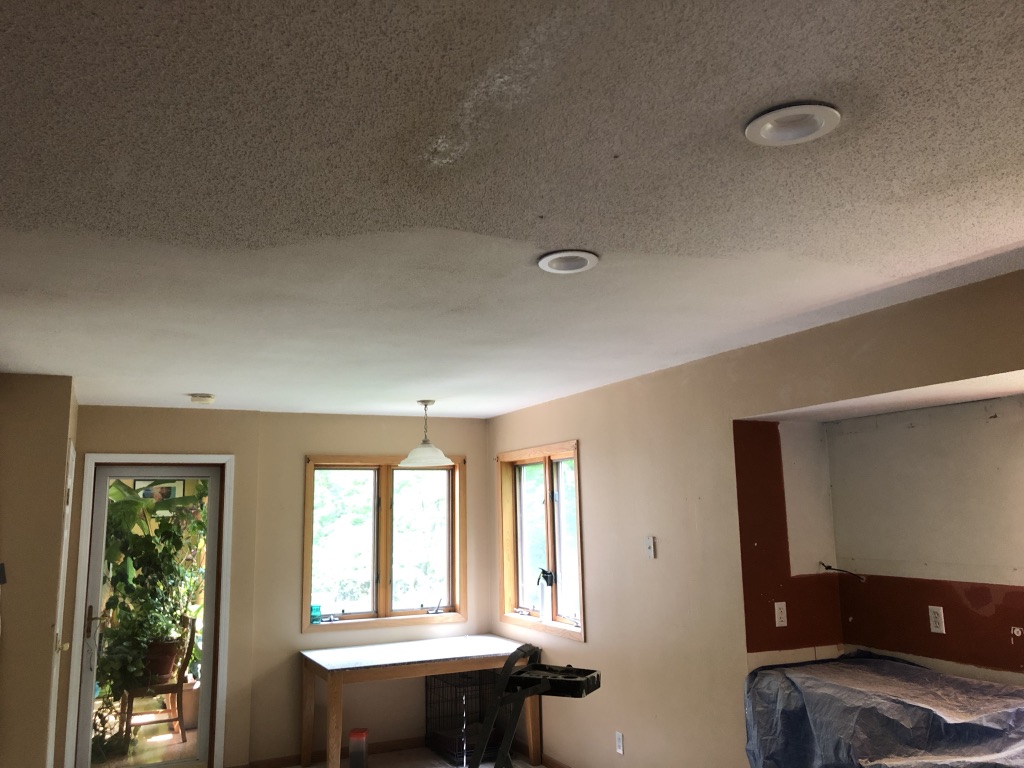
I removed all the popcorn on the ceiling and it made SUCH a difference. Then amount of light in the kitchen seemed to double with removal. I did a bunch of research,and opted for the dry removal method, where you scrape it all off with a big, sharp drywall taping knife. Afterward it looks like knockdown texture which you can paint. (This view is the opposite end of the initial picture; nothing much changed on this end of the kitchen.) It was messy but very satisfying, especially in an empty kitchen and with tarps. Anyone with an older home should know that they used to put asbestos in the popcorn, so do some research before attempting this yourself.
Then, the pantry needed a door. I found this tiny 20″ door on clearance at Menards. If you can’t fit in the pantry it’s time to stop eating.

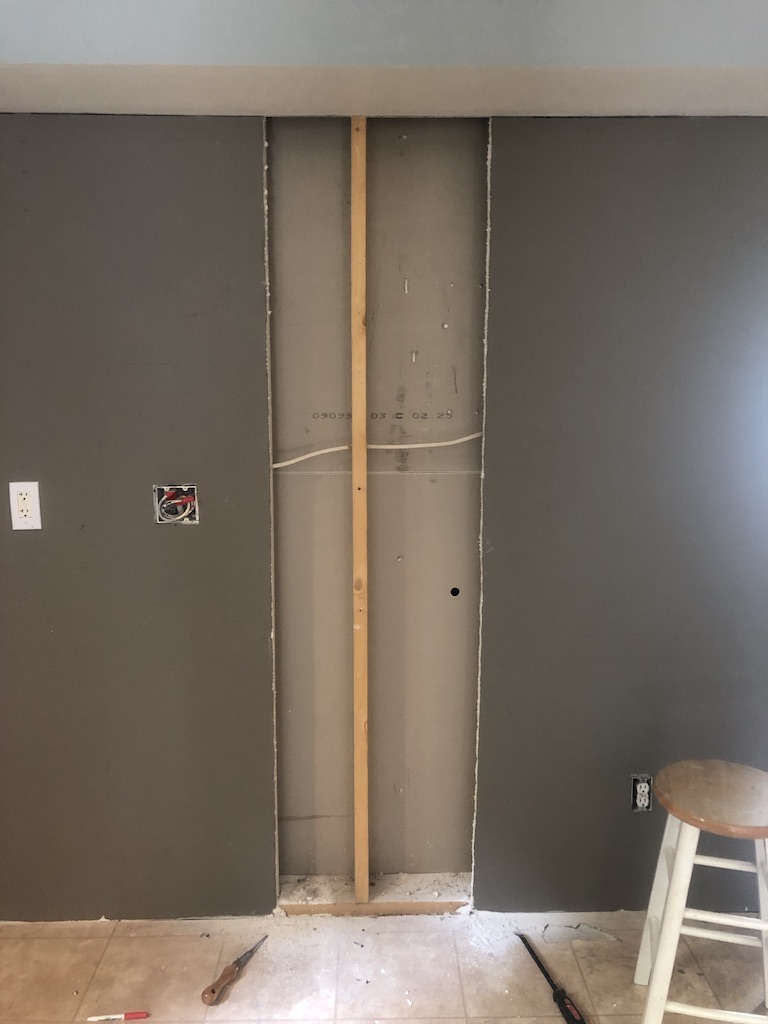
I got really lucky, because right before I started cutting into where the pantry door would be placed, I took a peek in the wall through a crack (under where the cupboards were) and spied a vent pipe. This resulted in some re-configuring, but better before the cut than after!


Because I wasn’t sure what was going to happen with the wood tones at that time (new windows versus old in adjacent areas), I stained the door blue; it turned out to be a nice accent.
If you think I’m having fun right now, I’m not.

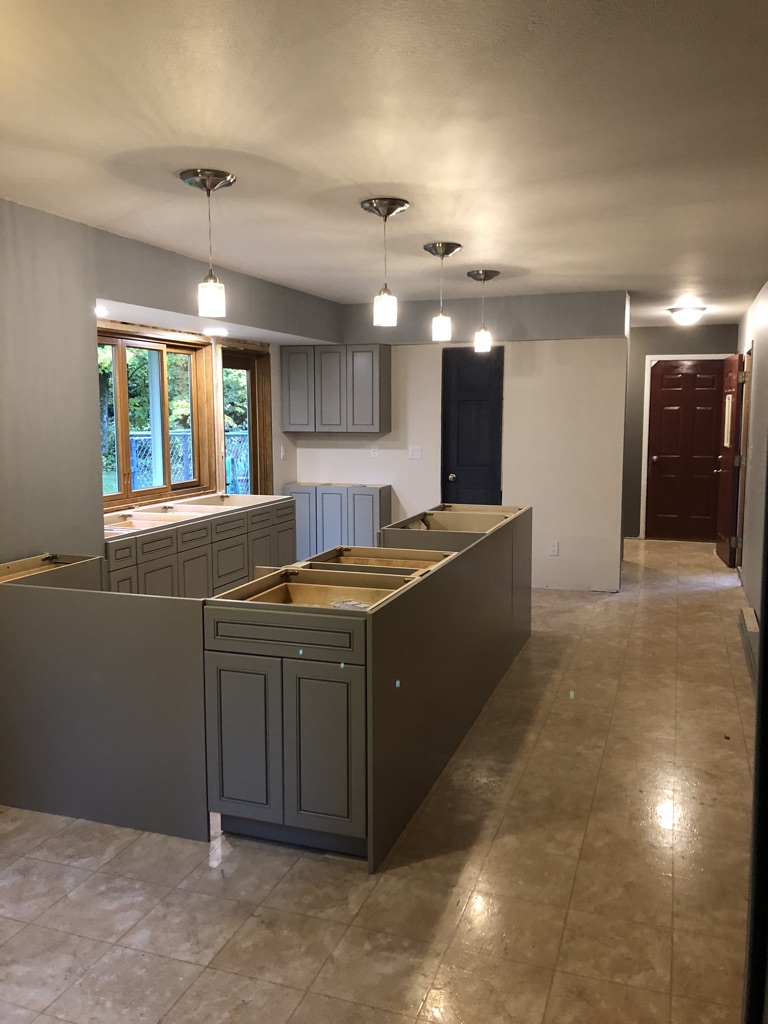
I found some amazing can light adapters on Amazon, and bought the pendants for them at Menards. I had to add two additional ceiling light fixtures; that sounds easy but involved lots of drilling through 2 joists on the ladder. Total $168 for light adapters and $41 for pendants. I also took out the dishwasher and sink.

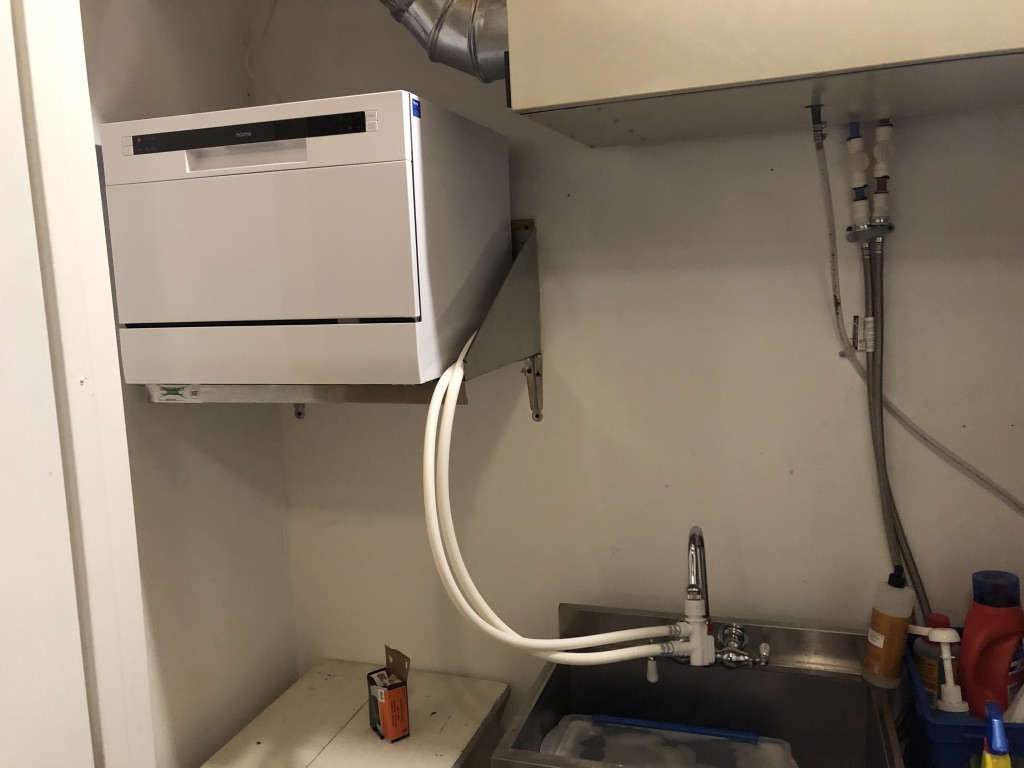
I have a small sink in the basement where I make wine (it’s actually an ice bin from a restaurant.) I did dishes by hand there for a while after I pulled the upstairs dishwasher, but eventually got REALLY sick of it and bought a small countertop dishwasher from Amazon. I actually love it, it’s great for all the bar glasses and eco-friendly; I use it every week even now.
So the exterior wall. My goal for the window was to get a gigantic window that you could pass things through to an outdoor “someday” deck, and an adjacent door. After a bunch of internet research I found the window I wanted and contacted their distributor in Alexandria that I never knew existed, Window Boss. I requested a quote for the window and Calen Burkey got back to me with the news that the window I wanted was $11,575 plus installation and it was too heavy for this bump-out portion of the house in any case (I guess I have good taste.) In addition, his quote did not include the adjacent door that I wanted. Calen then sent quote for a door and window with pass-thru by Kolbe in WI for $8,200 with installation. (We will eventually replace all the windows and doors with Kolbe products; I just love the quality.)
As an aside, without Calen this project would have been very different. He somehow knew EVERYONE that I would need to help with the project. I did already have a plumber, Gary Terhark of GT Plumbing, who I have been using ever since we moved here at Joe Unger’s recommendation.
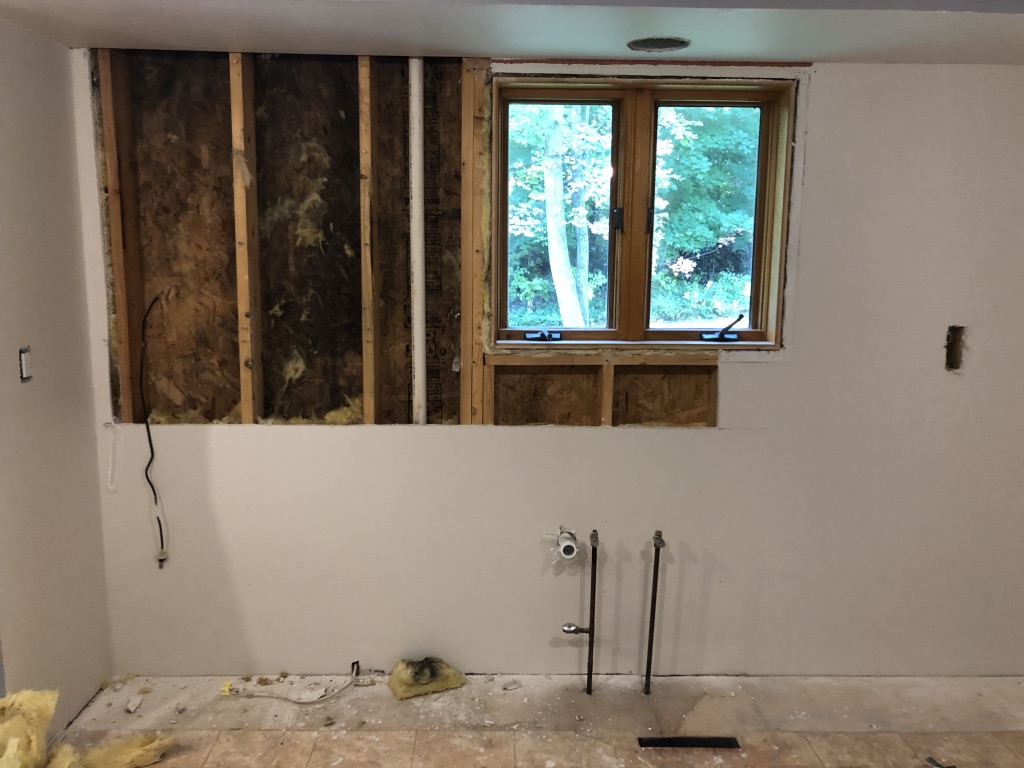
Unfortunately on window/door installation day we found a vent pipe in the wall. I just had Calen cut it off, took good photos and decided to deal with it at another time. (I later found the vent junction in the upstairs bathroom wall with likely search areas suggested by plumber Gary, hacked into two walls, and plumber Gary re-routed it later; the drywall holes are patched, but that’s as far as I got.) We also found some mouse damage to the wall and wiring inside the wall, so I was happy to get everything cleaned up. Gary the plumber had to come twice during the project: once to figure out the vent problem above and once to hook up the water and drains. While I’m capable of connecting sinks, my drains ALWAYS eventually leak, so I left that to the professional. I don’t remember what I paid Gary his help, but it was worth every penny.

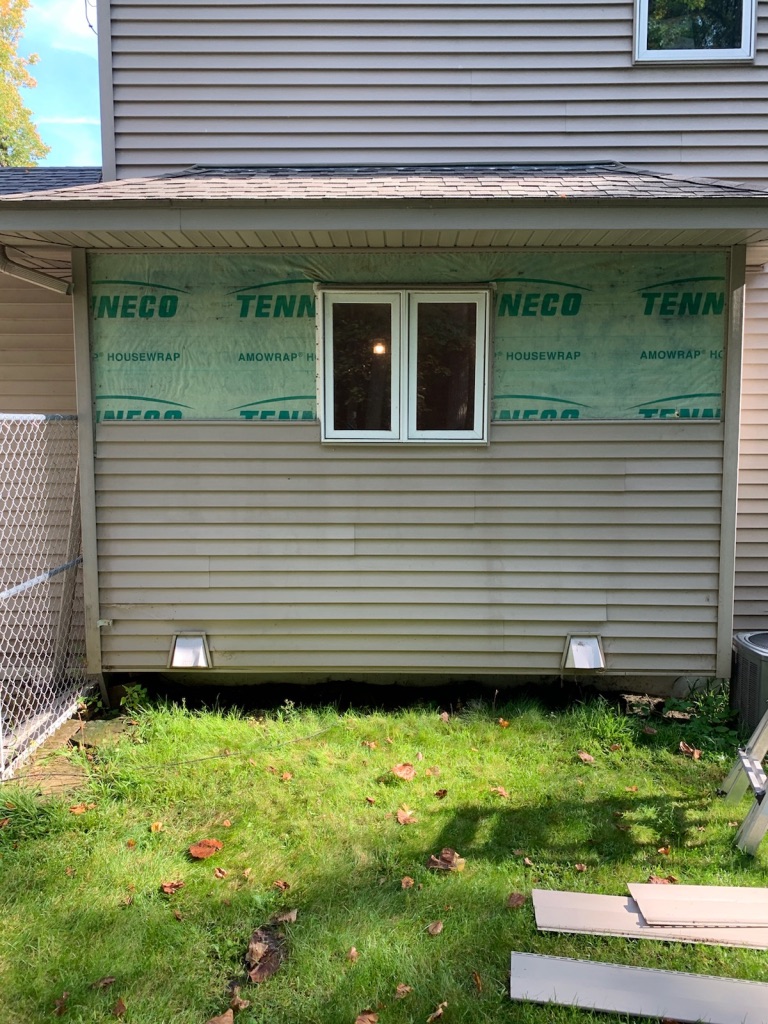
Outside, this was the biggest window on this side of the house:
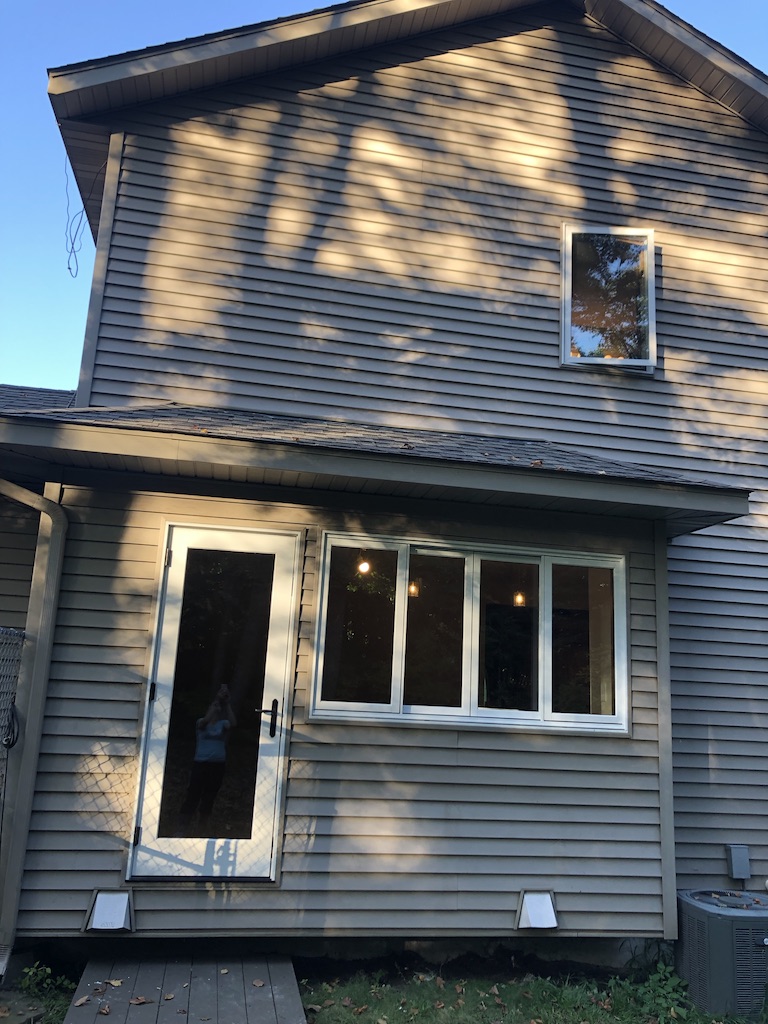
Here is the door and window just after install, SO NICE! The middle two windows slide to the side. There is a screen, but I haven’t used it yet; in fact it’s still in the box.
Calen knows someone for every job, so when it came time for cabinets he connected me with Travis at Miller’s Custom Woodworking. Another stroke of luck, because Travis helped me convert all the crazy ideas in my head to an actual, workable kitchen plan. We discussed possible cupboard choices, custom versus manufactured, wood versus solid color; I went with grey manufactured. I had assumed that I would put the whole plank floor in before the cupboards, but then learned the floor had to go in after so the floor can “float,” so I had to shift the whole project sequence. For a while I considered just buying cabinets and trying to install them myself; but I’m so glad I didn’t. Total cabinet cost with installation $6400, and Travis helped me avoid many unanticipated problems just by talking things through.
Remember this whole time I’m cooking in the basement. My friend Heather came and we made pasta from scratch. Sometimes meals were a bit of a trick. My daughter Madison was home for most of the remodel and became the master of this mini-kitchen. We made lots of homemade bread down there. Also, we got a new German Shorthair puppy during this time because, why not?!

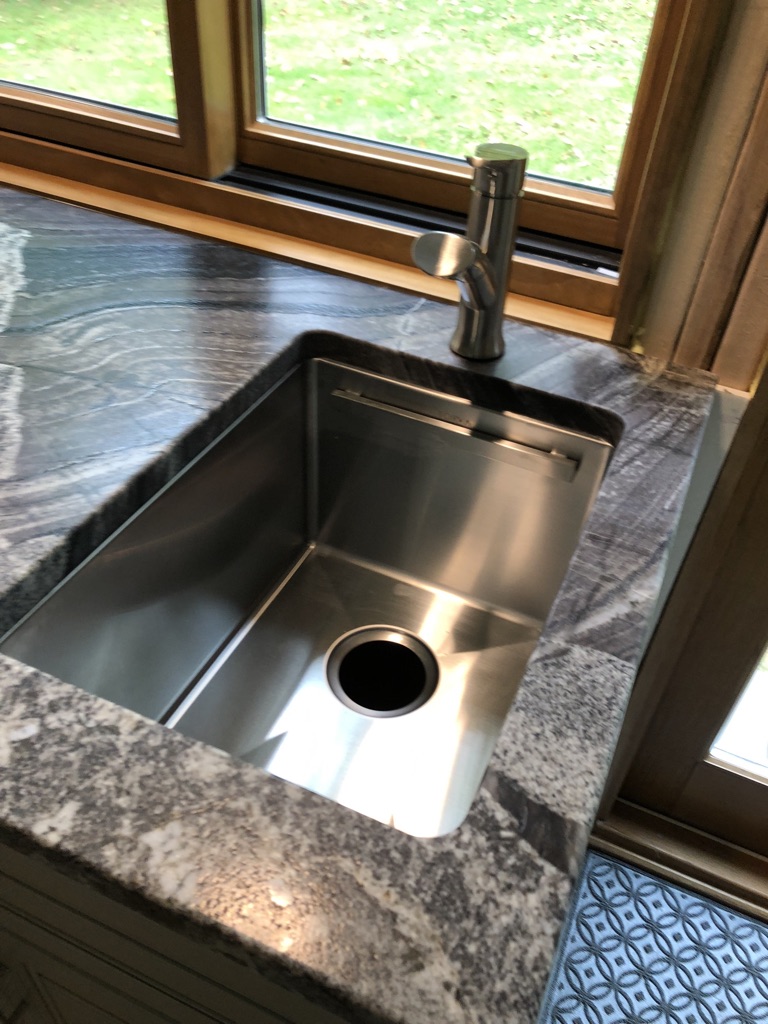
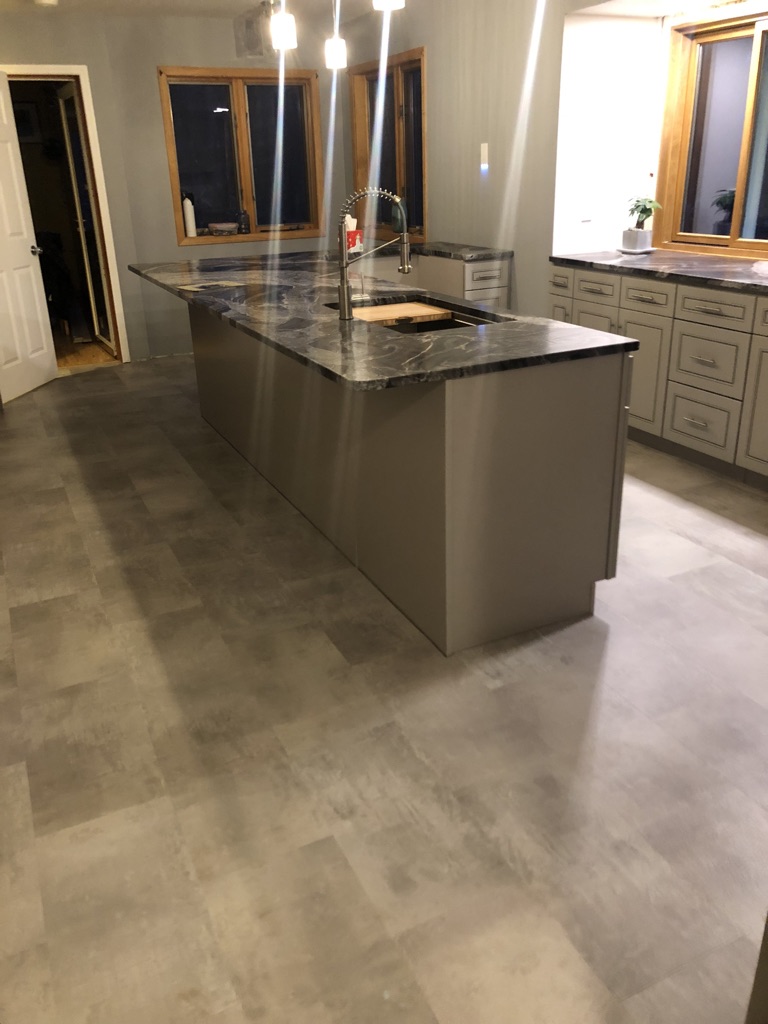
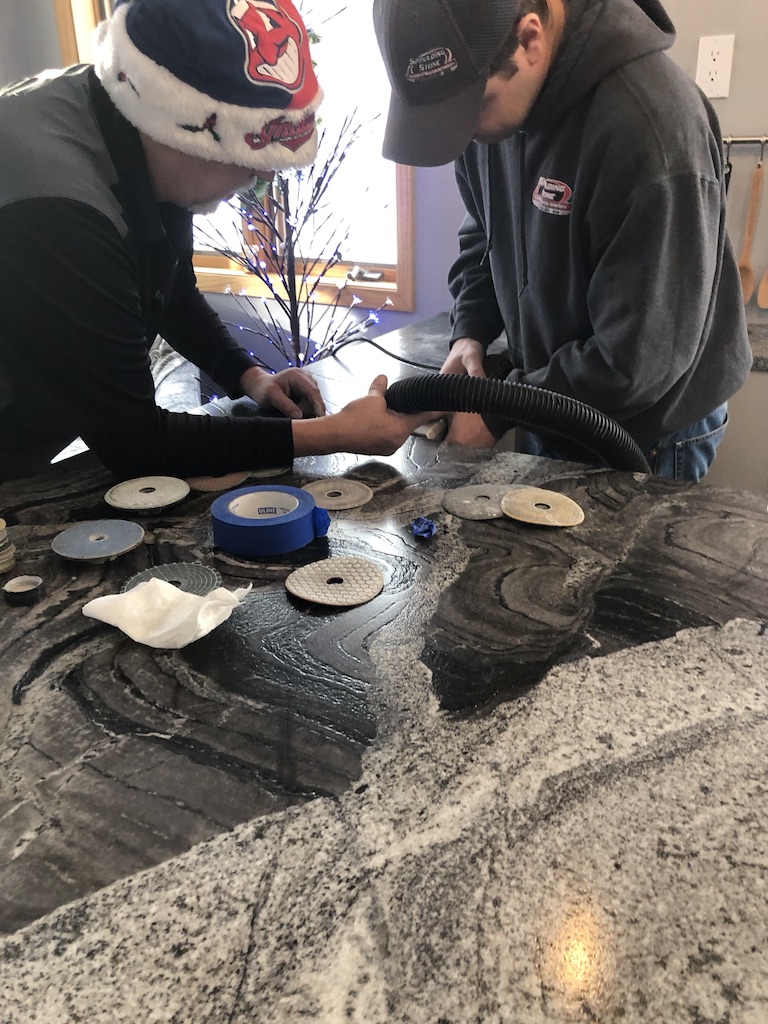
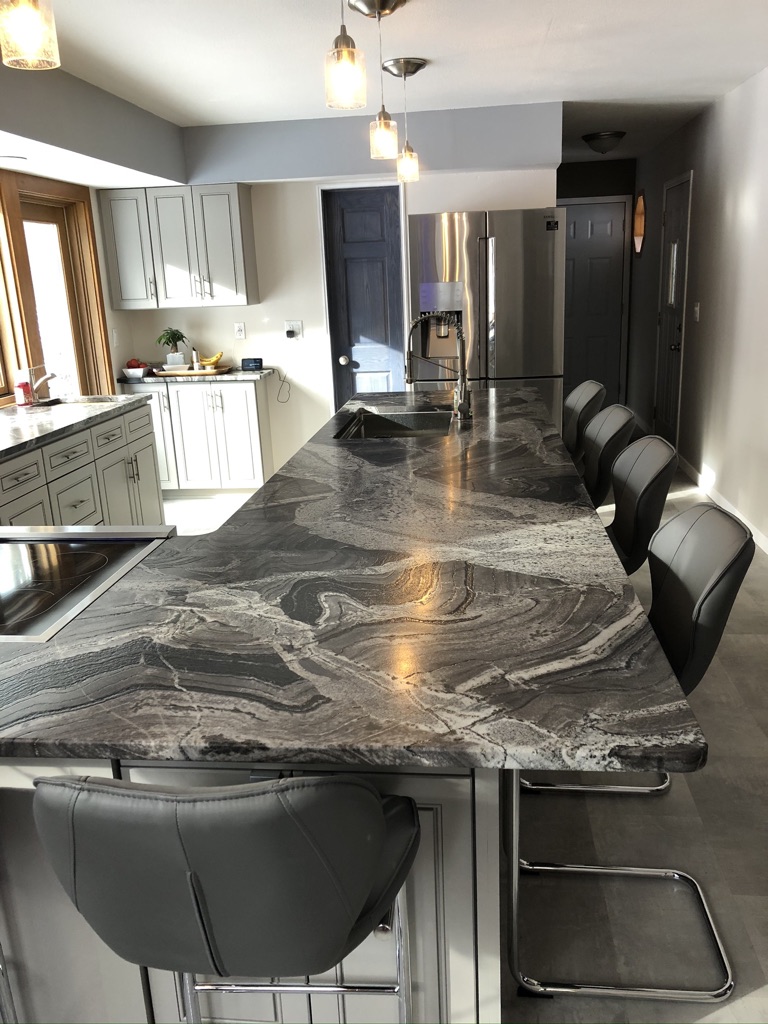
I wasn’t sure what I wanted for countertops and was was torn between granite and quartz; I ended up going with granite due to durability (mainly, you can cut lime and tomato on it.) Calen and Travis then connected me with Spalding Stone in Moorhead; I never actually went to Moorhead, they met me in Alexandria. To pick out the granite for the countertop they sent me to their partner at Stone Holding Company in Waite Park, where Chris Schmidt toured me through the showroom and gave me the granite education of a lifetime. I didn’t have a clue that I should have brought color and cabinet samples for matching, but we wandered around a bit and I found the one I wanted. I also decided wanted leathered granite (they basically grind of the shiny in favor of a dull finish) so I wouldn’t be able to see crumbs. As so often happens, the piece I loved was WAY more expensive than the standard choice I had been initially quoted; counters and install $6310. I feel like the countertops made the project, with patterns that look like a river in motion.


I bought my sinks from Amazon, and I couldn’t be more thrilled with them. They are workstation sinks with insets: Main Sink and Prep Sink. Make sure you watch the video for the Prep Sink; it’s hysterical, evidently sex sells sinks! Total cost for the main faucet, prep faucet and sinks from Amazon was $900. I had a little difficulty finding a short faucet with a pull-out handle for the prep sink (I didn’t want it to obscure the window), but after two tries I found one. I’ll be using this faucet for future bathroom sink replacements as well; so much more flexibility with the pull-out. My install for the main faucet was off by 90 degrees because I didn’t read the instructions; I quickly figured that out and fixed it once the water was running (the handle goes on the side.)

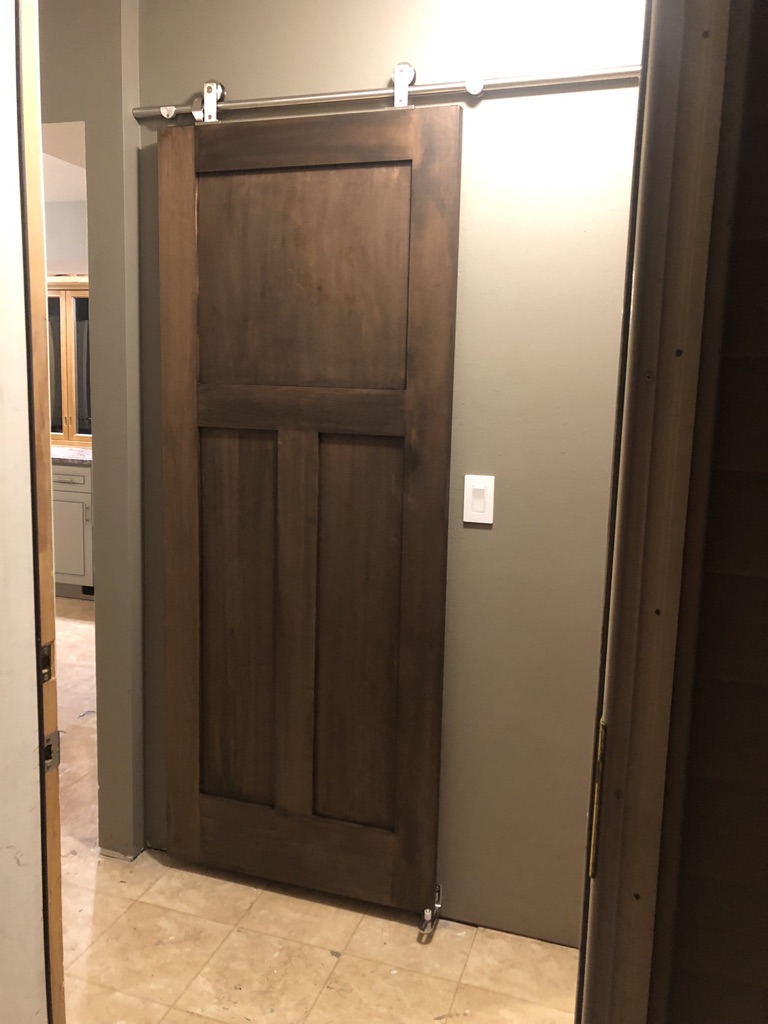
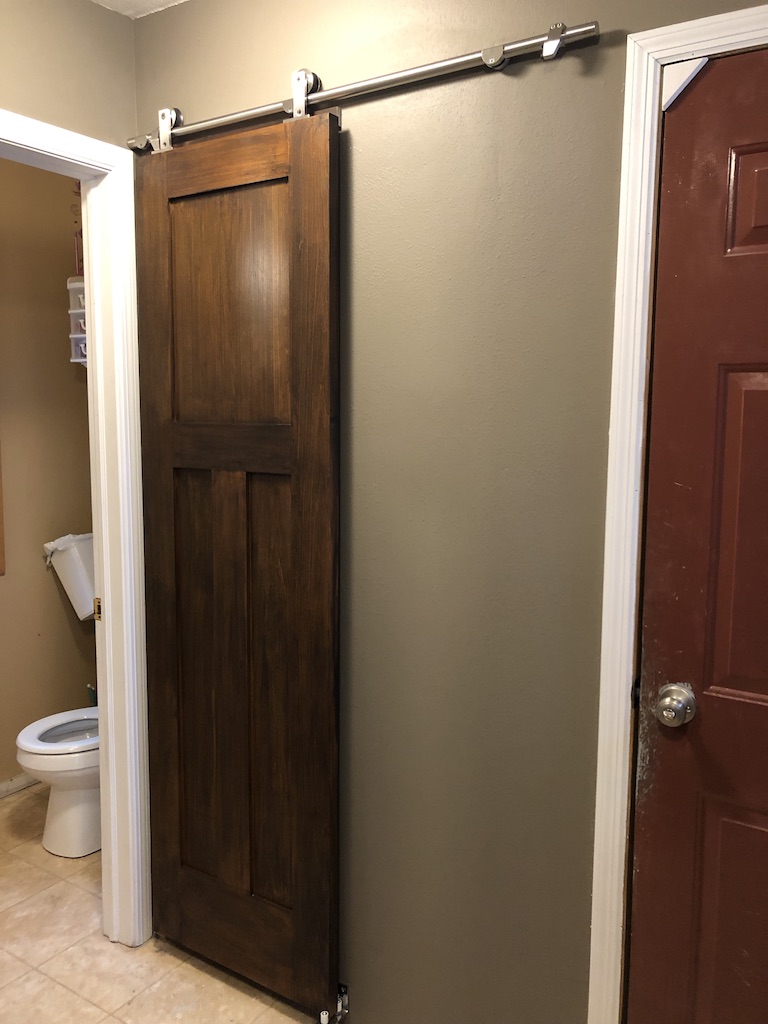
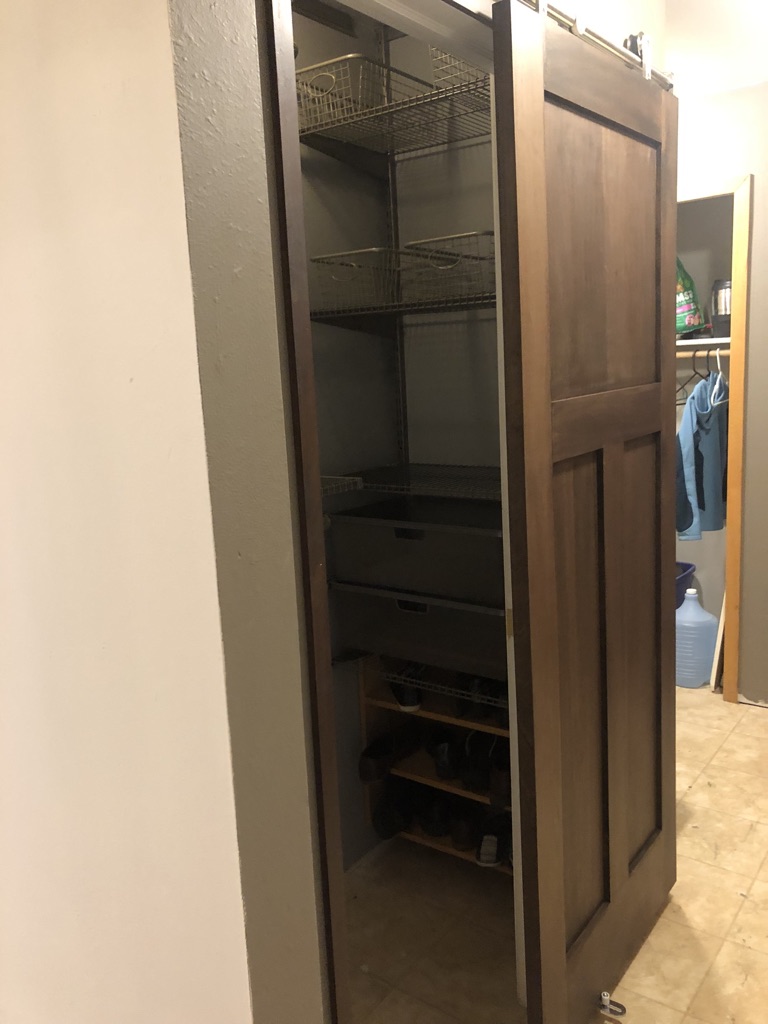
Then the small coat closet needed a door. I knew I had to do a sliding door because the old door opened inward and there wasn’t enough room for it to open because the closet was now just deep enough to hang coats. I found a stained slab in the Menards clearance rack for $10, and got the hardware on Wayfair. I didn’t like the Wayfair bottom door guide piece (mainly because it was unforgiving for install) so I bought a better one on Amazon; it sticks out further but this has not been a problem. There is another door in the back of the hall, and it was a trick finding a matching door slab; I ended up paying full price (around $150) for a mahogany stained slab at Menards, then overcoating it with black paint so it would match the other door. Total for the hardware and doors approximately $378. I had to make closet opening for the back closet smaller (build wall, drywall, texture), so that there would be enough room to do a matching sliding door (otherwise it would cover up the door to the garage when open.) I did a poor job of it; I think I redid the drywall/texture about 5 times before I called it good (don’t look too closely). The doors lift off easily, when helped as I kept revising the drywall.
I added closet shelving from Menards for $376 (the part you can’t see has coat hanging racks.) I changed out all the outlets and added lighted outlet covers to simulate path lighting; I also changed out all the wall switches.
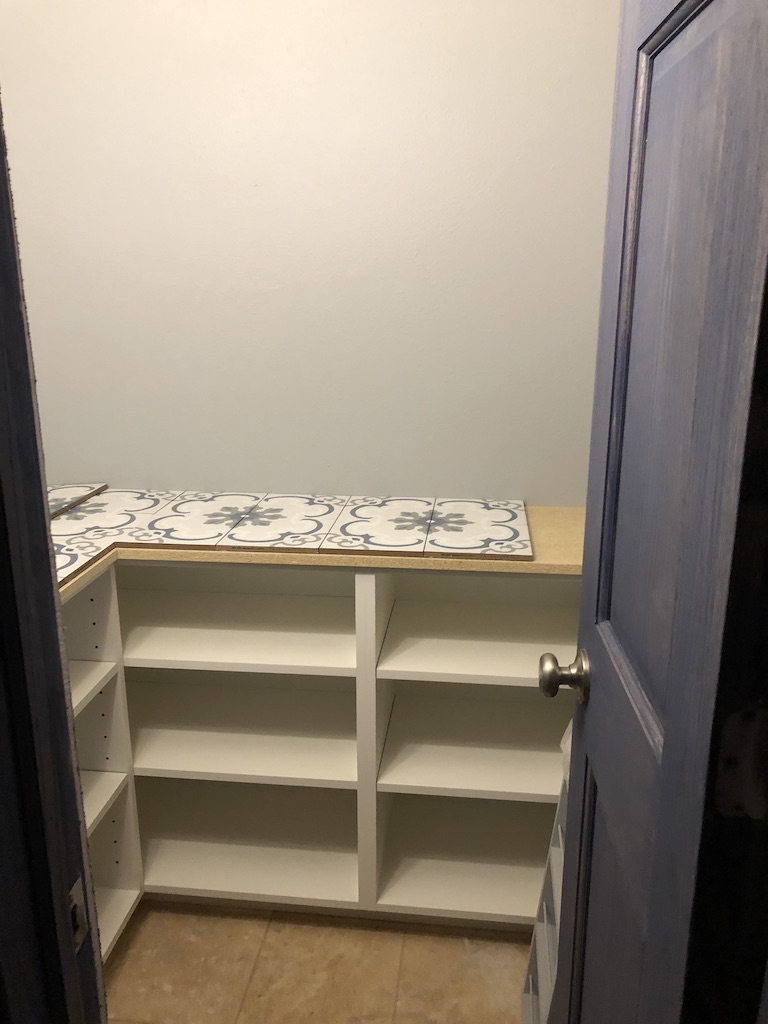
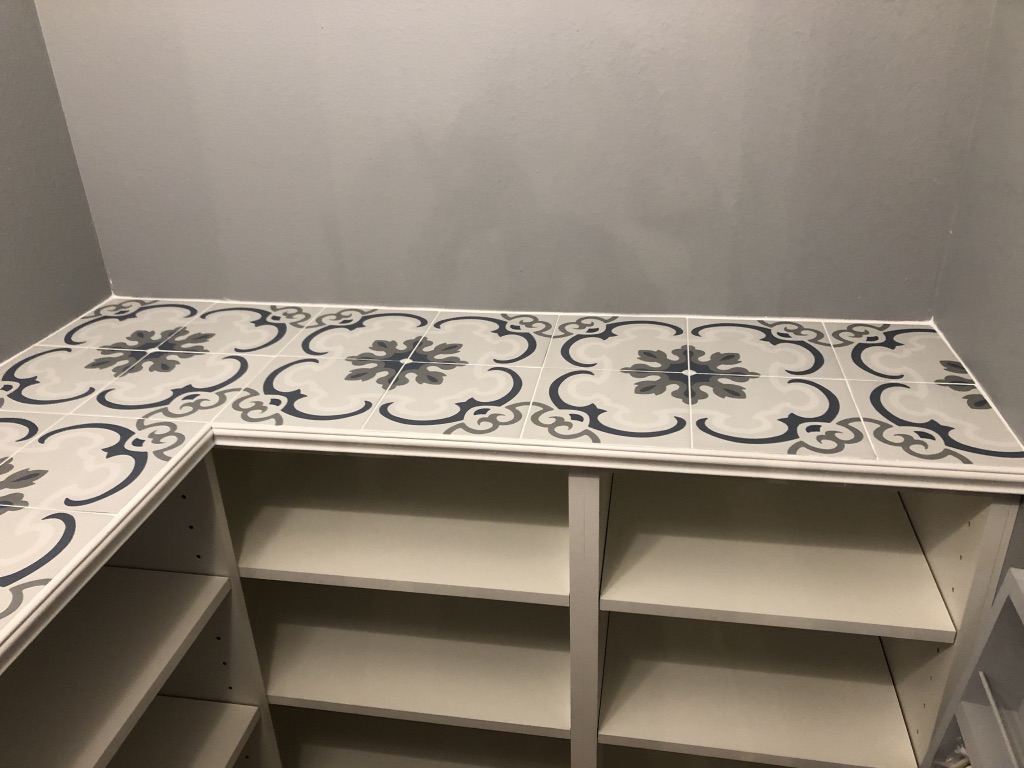
Other than the countertops, my favorite part of the project was the tiny butler’s pantry, behind the blue door. I was going to do this myself, but after Travis told me his ideas, it was clear he’d do a better job. We went back and forth about the configuration and in the end he built the bottom, I did the tile, then he built the top and I did the tile trim (which as of this writing needs a touchup.) Pantry $1700, plus the tile were about $1 a tile. It cost me $51 to rent the tile cutter to cut 4x tiles, which seemed insane at the time. I bought a few boxes of extra tile for future projects in the adjacent area outdoors. I feel like this area was a splurge just for me, but it is so nice to keep the toaster/coffee/mixer mess out of the main kitchen, and to see groceries at a glance.

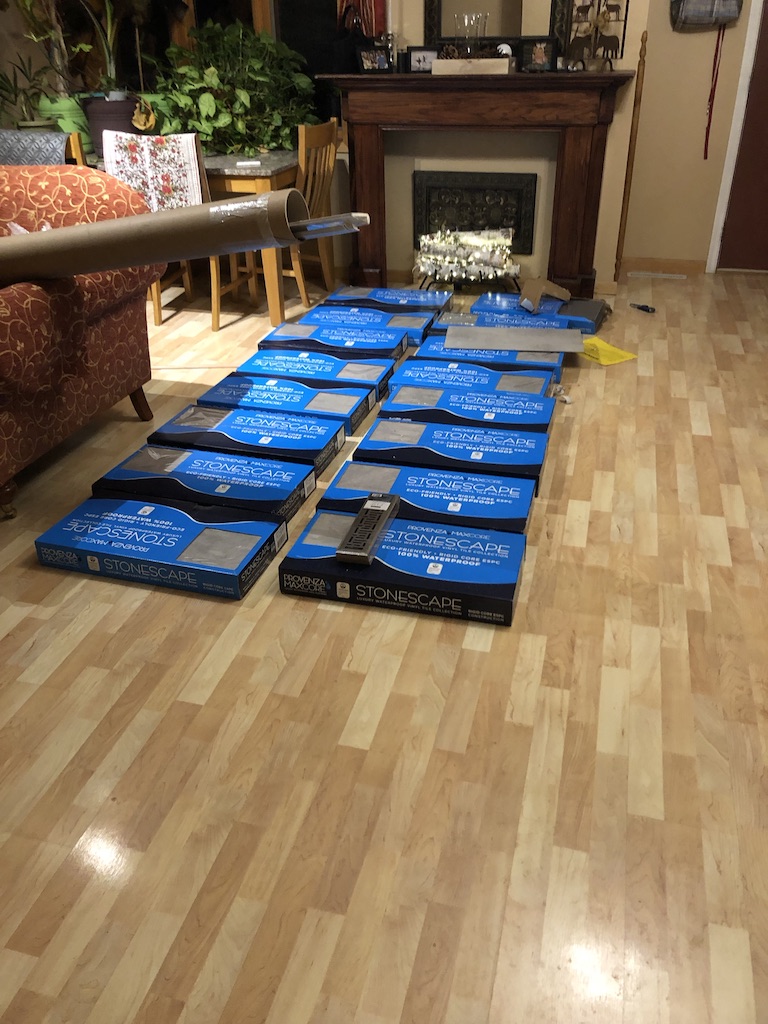
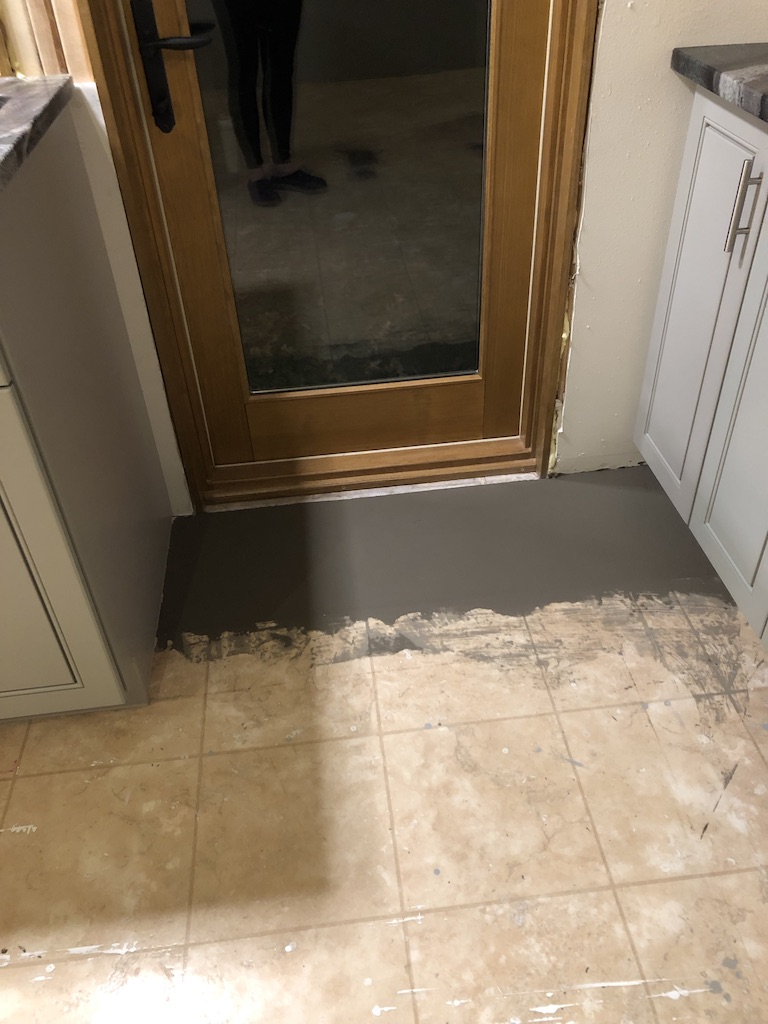
For the flooring I went to Arnquist Home Center in Alexandria. Josh helped me pick out a luxury plank vinyl which, by coincidence was called Piazza (I love Italy.) It is THE most forgiving floor. Installation was pure misery and I couldn’t have done it without my falconry friend Dean Young, who got me started on the first couple days, and Joe Unger, who also helped. I had to add the leveling, fill holes, etc.; but Josh told me exactly what to buy and it was a piece of cake. Floor total $1926, cutter rental $51, plus a lot of misery. We got to the island front on the first day and I finished the rest myself. I am not even going to discuss the trim, I HATED IT. HATE.

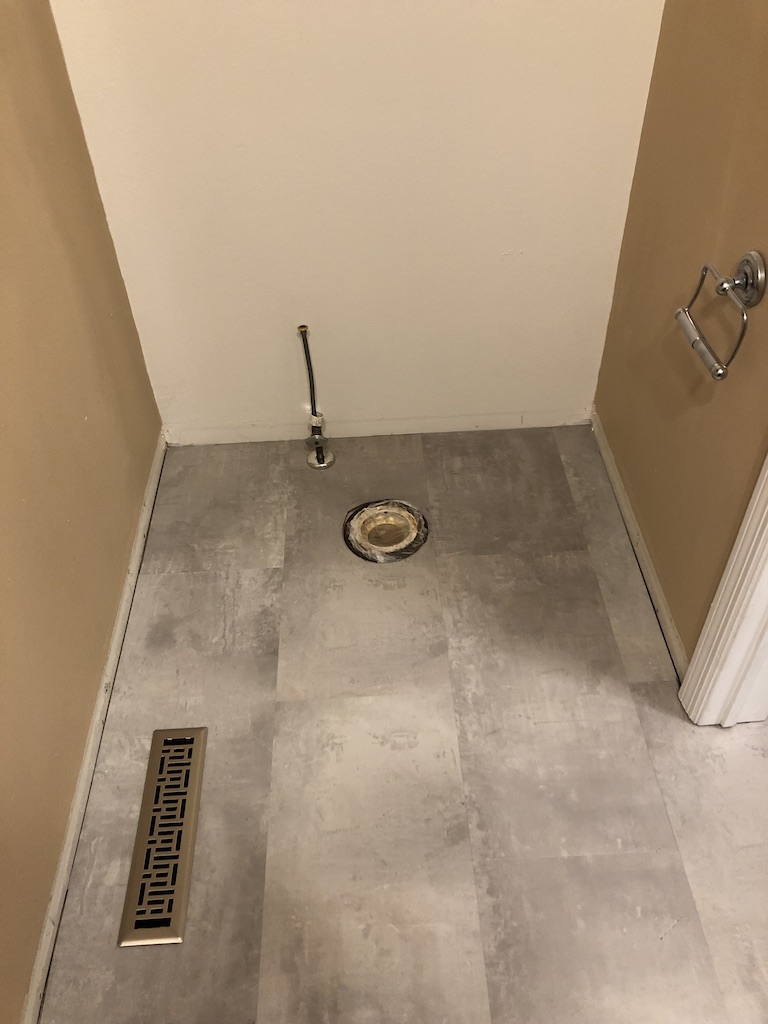
I had to pull out all the back bathroom plumbing for the floor install. I replaced the toilet, kept the sink, and got a sound activated toilet seat which has a nice blue light (the light switch for this bathroom is in a stupid place, way inside where you have to reach for it in the dark). I thought about moving the light switch, but as I hadn’t cut into any of those walls I decided against it. I replaced the light, thrifted a new mirror, and repainted two of the walls in the back bathroom (I was so sick of everything by then), but the two colors ended up making it look bigger.

I replaced the pendant light on the far end of the kitchen with one I still don’t love very much from Wayfair; I just never really found the perfect light in my price range. Maybe someday it will get replaced. I also got a great chair from Ron’s Warehouse.

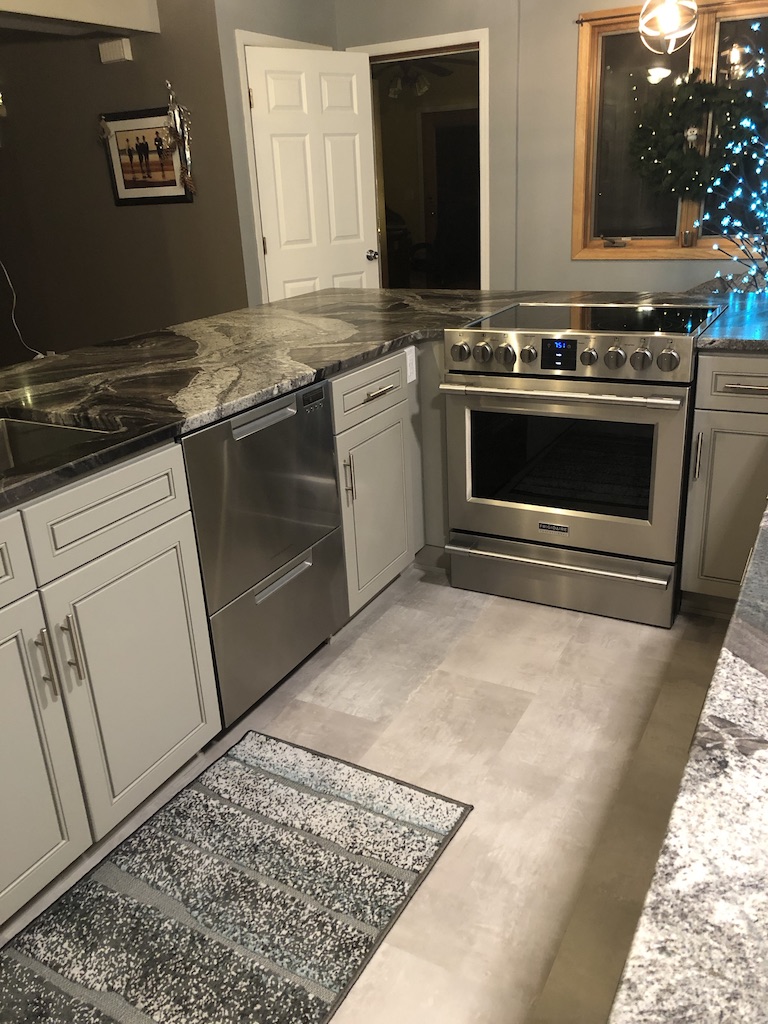
The appliances came! First the Fisher Paykel two drawer diswasher and the Frigidaire Range from Cullen’s in Alexandria for a total of $3863. The dishwasher and range had to go in before the refrigerator, since with the fridge in place there is only room enough to walk. I thought I purchased installation for the dishwasher, but I didn’t. Then I found the electric outlet for the dishwasher took up too much room to install the dishwasher in the allowed space, so add a day for rewiring. But I absolutely LOVE THIS DISHWASHER! You can run both drawers independently and the bottom drawer is nice for a small load. And somehow it feels less miserable to unload, because you only to do half a time. The range is fine, I’m not in love with it but I wanted a convection oven without a countertop vent, perfectly flat and even with the counter.

Unfortunately, I found this range AFTER I had the countertops in (I had previously picked a KitchenAid Range but then learned the self-cleaning feature was absolute crap; when I asked a salesman about it he said, “Just don’t boil anything over in the oven.”) So the countertop guys had to come back and fix the corners of the granite. I think that was an additional $200, plus I sent them home with wine (after all, it was almost Christmas.)

The refrigerator came from Costco, I wanted a particular Samsung model my friend Teela from work had purchased; the bottom right compartment can flex to be either a fridge or freezer, for us primarily a vegetable refrigerator. I needed french doors and counter depth for space reasons, so it was perfect. I will add that in appliance shopping almost EVERYTHING has some bad reviews; I subscribed to Consumer Reports and was wracked with indecision. I bought the warranty for the fridge and stove; refrigerator total with warranty $2705.

Then, the most STUPID thing happened. I ran the clean cycle on the oven to clear out all the chemicals before using and that made seal on the stove puff up so much that it then obstructed the drawer (this was the night before the countertop elves came for their fix, so Travis was there anyway.) There was at least two inches of clearance between the drawer and the range door prior to the oven cleaning. Travis fixed it for me, but I directed a “quick fix” that was not up to his quality standards, just something I could live with. We aren’t going to discuss that in further detail to spare Travis any misery:)

My biggest mistake (and there were many) was not measuring the coffee maker with the LID OPEN and emulating a fill. It was originally supposed to go on the small counter to the right of the door, but then you can’t pour the water in. In any case I’m not sure I’d have done anything different in that area; I needed the cupboard space as those are my only upper cupboards now. The coffee pot lives in the pantry, which it turns out I like better anyway as all the coffee and toaster mess lives in a place where you can close the door.
I found some great bluetooth speakers that connect to my Echo Show; they are installed in the two light fixtures in front of the window, one of which I added.
I couldn’t find bar stools I liked until after the holidays. I went to SO MANY stores and was disheartened to see single barstools in the $300-500 range. But I’m glad I waited, I got two sets of four from Wayfair for a total of $579, thinking that if I had 8 and we wrecked a couple I’d still have enough. One is “kind of” broken right now, but you can’t really tell.
A year later I love everything about the kitchen, every day. As we get closer to Christmas I’ll post details about our first big family holiday meal prep last year; that adventure deserves its own piece. In retrospect, I think that I may be the only person in the HISTORY of all home remodels, who happened to find to find EXACTLY THE RIGHT PERSON for EVERY aspect of the job. Everyone showed up on time, every time, always within budget, and with exemplary quality work. I’d especially like to thank Calen from Window Boss and Travis from Miller’s Custom Woodworking; this project wouldn’t have come together without their expertise and patience. Also, thanks to my girls Madison and Kirby, and all the nurses I work with, for putting up with blow-by-blow updates for 7 months.
No project happens without a fantastic dogs. LOVE YOU FOREVER Leila, Fancy and Keeli!
D